Thrifted & Upcycled Christmas Villages
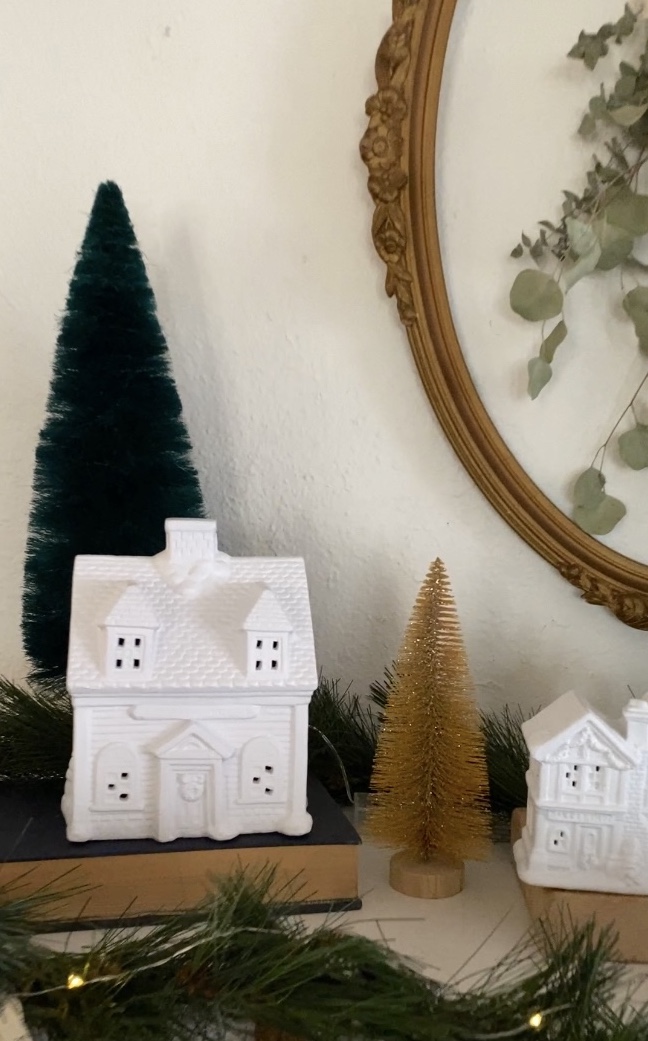
Day three of my 12 Days of Christmas Homemaking series, and it’s all about these thrifted & upcycled Christmas villages! These DIY Christmas Villages are so simple and frugal, and the perfect project as you prepare your home for Christmas. I saw this on Burch Acres Instagram last year, and I knew I had to try it this year. I love how they turned out!


Thrifted & Upcycled
I love a good upcycle! Thrifting is a hobby for me, and I see these Christmas villages all the time during Christmas season. Upcycling is where you take an item that would normally be discarded, and give it new life. I think that’s just what I did with these Christmas villages! I found all these at the thrift store for about $2 a piece. Very frugal, and I love repurposing items that would most likely end up in a landfill. The white is more my style, and it goes great with the rest of my simple, Christmas decor.
Spray painting is really easy, but make sure you shake the can well. Do light sprays as you go. Make sure to let it completely dry between coats. Two coats completely covered these, and I love how the matte paint really lets the textures of the Christmas villages show through.

How to Make:
- Thrift some Christmas villages! I did try some plastic pieces and they didn’t turn out as well, so stick with the glass village pieces. Wash each piece, and let them dry completely.
- Buy some matte white spray paint. This is what I bought, and it worked perfectly.
- In a well-ventilated area, or outside, spray each piece lightly twice, making sure to let them full dry between each time.. Make sure you get up under all the eaves on the houses. Two coats worked well on all if my pieces.
- Let them completely dry and then they are ready to go!
- You can add to your collection each year! I am really excited about that!
This post contains affiliate links, which means I make a small commission at no extra cost to you. Please read our disclosure policy.
Pin it for Later…


