
Chocolate Old-Fashioned Doughnuts
Can you beat chocolate old-fashioned doughnuts for a treat?! They are rich and chocolate-y and perfect with a cup of coffee or milk! Try this doughnut recipe for a fun Saturday morning surprise for you family instead of heading to the doughnut shop. I really think they will be the best old-fashioned doughnuts you will ever try!

What Makes Old-Fashioned Doughnuts Unique?
This recipe is simple but offers a unique richness and texture to it thanks to the sour cream! I would say it is the secret ingredient to these old-fashioned doughnuts. I made these for my children and they thought I was the best mama ever to make them homemade doughnuts! This is definitely not an every day recipe, but such a fun treat.
Try and think ahead and have this prepped and ready to throw in the fridge for about an hour. Just enough time to make coffee and get ready for the day. Then fry them up and they will be great for a brunch! These would also be perfect for a birthday party or any other event=, and you can definitely make mini versions. Who doesn’t love a good chocolate old-fashioned doughnut!

Supplies You’ll Need
- Mixing Bowls
- Whisk
- Stand Mixer or Hand Mixer
- Wooden Spoon
- Cling Wrap or a Bowl Cover
- Parchment Paper
- Rolling Pin
- Tongs
- Doughnut Cutter or a large mason jar lid and a small circle for doughnut center
- Large Pot for frying
- Wire Cooling Rack
Ingredients Needed
- Sugar
- Butter
- Egg Yolks
- Flour: If you can find or have cake flour, use that. I didn’t and had great success with all-purpose, non-bleached flour.
- Cocoa
- Baking Powder
- Salt
- Sour Cream
- Cornstarch
- Frying Oil: canola, peanut, or vegetable oil work great.. I used vegetable oil.
- Powdered Sugar
- Hot Water
- Corn Syrup
- Vanilla Extract
Hey friends, please don't forget to follow me over on Instagram! I post more photos and ideas over there. If you enjoyed this recipe, I would really appreciate it if you would review it so others can find it and cook it as well. Sharing this recipe on Facebook or Pinterest is another great way you can help me out at not cost to you.
Instructions for Chocolate Old-Fashioned Doughnuts
Step 1: In a stand mixer bowl or a large mixing bowl with beaters, cream the granulated sugar and butter. Add the egg yolks and beat until pale, thick, and completely blended. Set aside.

Step 2: Now, in a medium bowl, whisk together the flour, cocoa powder, baking powder, and salt. Make sure they are well combined.

Step 3: Slowly incorporate the dry ingredients into the wet mixture in batches, alternating with dry ingredients and sour cream until everything is thoroughly mixed together.

Step 4: Place dough in a large bowl and cover with cling wrap. Now chill the dough in the refrigerator for at least one hour.

Step 5: Liberally flour a clean work surface, then unwrap and place the chilled dough onto it. Sprinkle flour over the dough and your rolling pin, then roll it out to ½-inch thickness.


Step 6: Now time to cut out your doughnuts! If you have a doughnut cutter, use great. If not, then use a large mason jar lid and some sort of small circle for the center. Cut out as many donuts as possible, flouring and cleaning the cutters as needed. Gather and re-roll the scraps as necessary to use up all your dough. Place cut out doughnuts and doughnut holes aside on parchment paper.

Step 7: Warm your oil in a large pot on medium heat. The oil needs to be around 325 °F. If you don’t have a thermometer, warm to the point that a splash of water sizzles when splashed onto the oil.
Step 8: Gently lower doughnuts into the hot oil. Fry in smaller batches of 3-4 doughnuts, ensuring not to overcrowd your pot. Cook for 2 minutes on the first side, then flip using tongs, and fry for an additional 1 minute and 30 seconds on the other side. Transfer to the prepared wire cooling rack. Finsh with frying the doughnut holes for 1 minute per side.

Step 9: Prepare the glaze in a large bowl. Whisk together all the glaze ingredients until smooth. Dip each doughnut into the glaze, using a fork to turn and coat evenly. Let any excess glaze drip off before placing the doughnuts on a wire rack to set and harden.


Tips and FAQS for Perfect Chocolate Old-Fashioned Doughnuts
How do I avoid greasy doughnuts?
Do not overcook your doughnuts to avoid making them greasy.
What if I don’t have a doughnut cutter?
If you don’t have a doughnut cutter (I didn’t), use a large mason jar lid and some sort of small circle for the center to cut out the doughnut holes.
Why do I have to let the dough rest for an hour?
Resting the dough really helps the texture to be smooth and allows the flavors to be perfect.
How do I store my doughnuts?
Store the doughnuts for up to 3-4 days in a ziplock bag. Glass storage containers work great for this as well.
What type oil can I use for frying?
Use canola, peanut, or vegetable oil for frying. These will not really affect the flavor like coconut oil or olive oil will.
Can I omit the corn syrup from the glaze?
Absolutely! This shouldn’t affect the flavor at all, but the glaze will be a tad more runny. Give the doughnuts time to set up and the glaze to harden a bit.
Variations & Serving Suggestions
- You can drizzle the doughnuts with chocolate drizzle or powdered sugar instead of glazing them.
- Serve with coffee! They are the perfect sweetness.
- Consider making mini doughnuts for kids or parties! Perfect for a brunch.
From one home cook to another, I hope you enjoy this recipe!

Chocolate Old-Fashioned Doughnuts
Equipment
- 2 Mixing Bowls
- whisk
- Stand Mixer or Hand Mixer
- Wooden Spoon
- Cling Wrap or a Bowl Cover
- parchment paper
- Rolling Pin
- Tongs
- Doughnut Cutter or a large mason jar lid and a small circle for doughnut center
- Large Pot for frying
- Wire Cooling Rack
Ingredients
Chocolate Doughnuts
- 1/2 cup sugar
- 3 tablespoons butter
- 2 large egg yolks
- 2 cups flour
- 1/2 cup cocoa
- 1½ teaspoons baking powder
- 1 teaspoon salt
- 1 cup sour cream
Glaze
- 3 cups powdered sugar
- 1/3 cup hot water
- 1½ teaspoons corn syrup
- ½ teaspoon vanilla extract
- ¼ teaspoon salt
Instructions
Chocolate Doughnuts
- In a stand mixer bowl or a large mixing bowl with beaters, cream the granulated sugar and butter. Add the egg yolks and beat until pale, thick, and completely blended. Set aside.
- Now, in a medium bowl, whisk together the flour, cocoa powder, baking powder, and salt until well combined.
- Slowly incorporate the dry ingredients into the wet mixture in batches, alternating with dry ingredients and sour cream until everything is thoroughly mixed together.
- Place dough in a large bowl and cover with cling wrap. Now chill the dough in the refrigerator for at least one hour.
- Liberally flour a clean work surface, then unwrap and place the chilled dough onto it. Sprinkle flour over the dough and your rolling pin, then roll it out to ½-inch thickness.
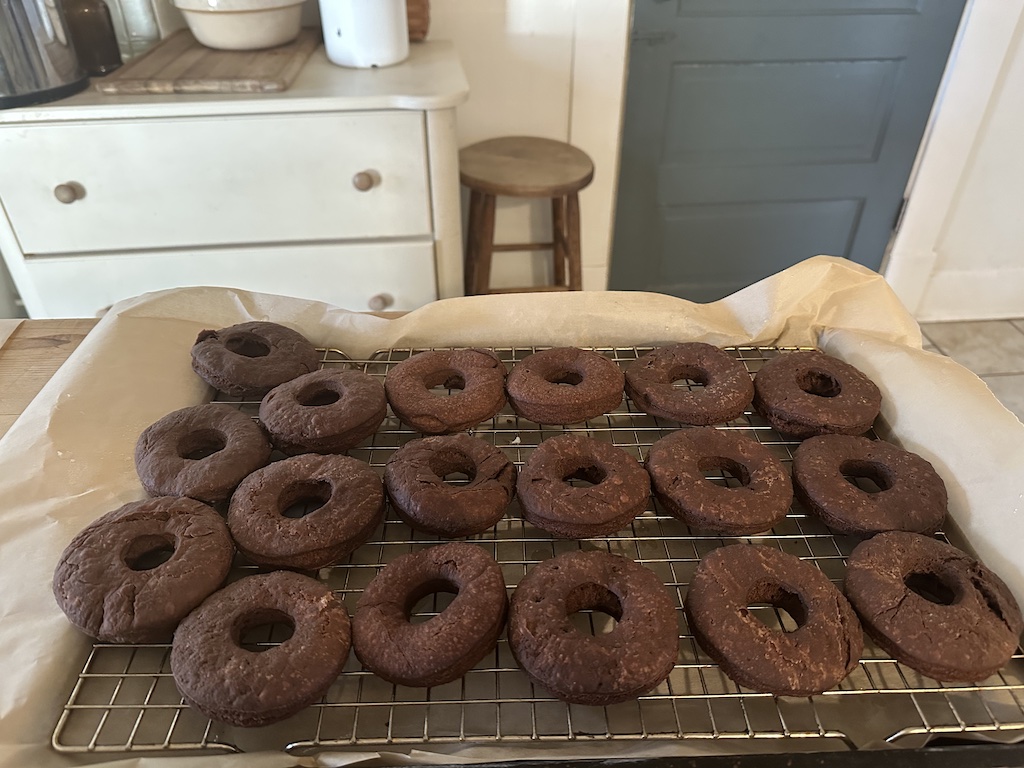
- Now time to cut out your doughnuts! If you have a doughnut cutter, that is great. If not, use a large mason jar lid and some sort of small circle for the center. Cut out as many donuts as possible (I was able to cut out 18), flouring and cleaning the cutters as needed. Gather and re-roll the scraps as necessary to use up all your dough. Place cut out doughnuts and doughnut holes aside on parchment paper.
- Warm your oil in a large pot on medium heat. The oil needs to be around 325 °F. If you don't have a thermometer, warm to the point that a splash of water sizzles when splashed onto the oil.
- Gently lower doughnuts into the hot oil. Fry in smaller batches of 3-4 doughnuts, ensuring not to overcrowd your pot. Cook for 2 minutes on the first side, then flip using tongs, and fry for an additional 1 minute and 30 seconds on the other side. Transfer to the prepared wire cooling rack. Finsh with frying the doughnut holes for 1 minute per side.
Glaze
- Prepare the glaze in a large bowl. Whisk together all the glaze ingredients until smooth. Dip each doughnut into the glaze, using a fork to turn and coat evenly. Let any excess glaze drip off before placing the doughnuts on a wire rack to set and harden.
This post contains affiliate links, which means I make a small commission at no extra cost to you. Please read our disclosure policy.
pin it for later…

More Posts To Enjoy:
- How Long to Proof Sourdough (Complete Guide)
- The Wonder & Tower Homemaker’s Library: 30+ Free Printables
- 20 Easy Ideas to Save You Money on a Tight Budget
- 20 Creative Journaling Ideas (Bible Journaling for Women)
- 55 Bible Journaling Prompts for Christian Women