7 Signs Your Sourdough Is Done Proofing
Here are 7 Signs Your Sourdough Is Done Proofing so you can confidently know when your dough is ready to move on to the next step.
Knowing when sourdough is done proofing can be one of the trickiest parts of baking sourdough bread. A recipe can give you a general timeline, but your dough may move faster or slower depending on the temperature of your kitchen, the strength of your starter, and even the time of year.
For a complete proofing guide, check out How Long to Proof Sourdough
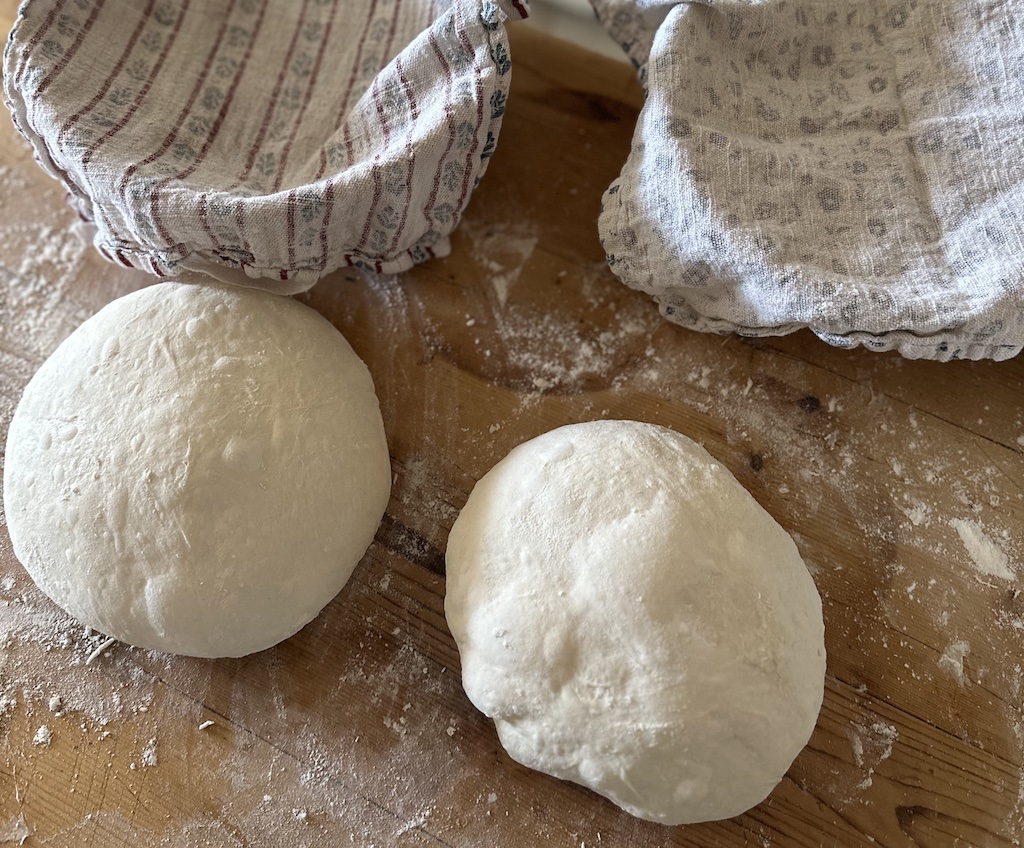
Instead of watching the clock alone, learn to watch the dough. This comes with experience as yo bake more bread, Don’t be discouraged! I will give you some helpful signs to get your sourdough bakes off to a. good start.
Once you know what properly proofed sourdough looks and feels like, it becomes much easier to know when your dough is ready to shape or bake.
If you like this sourdough post, you’ll love trying a few of my favorite sourdough recipes too, especially my sourdough discard recipes, my fluffy sourdough blueberry muffins, or my simple sourdough bread recipe that beginners always succeed with.
1. Your Dough Has Increased in Size
One of the easiest signs your sourdough is done proofing is a noticeable increase in volume.
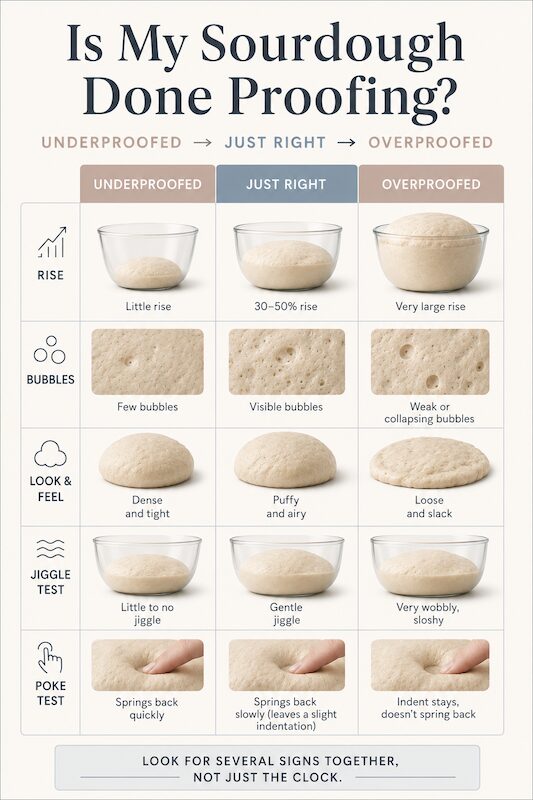
During bulk fermentation, sourdough dough will usually increase by about 30–50%, although the exact amount can vary depending on your recipe and dough temperature.
You don’t necessarily need to wait for your dough to double. In fact, waiting for it to double can sometimes lead to overproofed sourdough.
A straight-sided container can make it much easier to see how much your dough has risen.
Signs Your Sourdough Is Done Proofing Tip:
Use a straight-sided container during bulk fermentation and mark where your dough started with a rubber band or dry-erase marker. It’s much easier to judge a 30–50% rise this way than in a wide mixing bowl.

Shop Sourdough Supplies & Best Tools

2. You Can See Bubbles in the Dough
As your sourdough ferments, the wild yeast in your starter produces carbon dioxide. Those gases become trapped inside the gluten structure and create bubbles throughout the dough.
Look along the sides and bottom of your container. You should begin to see small bubbles beneath the surface, with an occasional larger bubble appearing on top.
These bubbles are a good indication that fermentation is active and your dough is developing properly.
Related Post: Sourdough Starter Schedule: How to Feed and Maintain
3. The Dough Looks Puffy and Slightly Domed
Properly proofed sourdough should look noticeably different from freshly mixed dough.
Instead of looking dense and flat, it should appear lighter, puffier, and slightly domed.
The edges of the dough may also begin pulling away from the sides of the bowl or container rather than sitting heavily against them.
Think soft and aerated rather than loose and flat.
Signs Your Sourdough Is Done Proofing Tip:
Take a quick photo of your dough when you first put it in the container. If you’re unsure whether it has changed enough, compare it to the photo instead of relying on memory.
4. The Dough Has a Gentle Jiggle
This is one of my favorite ways to check sourdough.
Gently shake the bowl or container. Properly fermented dough should have a soft, slightly wobbly movement to it.
It shouldn’t slosh around like batter, but it also shouldn’t feel stiff and heavy.
That little jiggle is a good indication that your dough has filled with gas and developed a lighter structure.
5. Try the Poke Test
The sourdough poke test can be especially helpful when checking your dough after its final proof.
Lightly flour your finger and gently press about ½ inch into the dough.
Watch what happens:
- Springs back immediately: It likely needs more proofing time.
- Slowly springs back and leaves a slight indentation: Your sourdough is likely ready.
- Doesn’t spring back at all: Your dough may be overproofed.
The poke test isn’t perfect on its own, so I like to use it alongside the other signs on this list.
Want my simple sourdough care + baking guide?
Grab my FREE Sourdough Instructions Printable and learn how to bake sourdough with confidence.
6. The Dough Feels Airy
When you handle properly fermented sourdough, it should feel noticeably lighter than it did at the beginning of bulk fermentation.
As you turn it out for shaping, you may even be able to see bubbles beneath the surface.
Handle it gently at this stage. You want to preserve as much of that beautiful air as possible while shaping your loaf.
Related Post: How Do I Know If My Sourdough Starter Is Bad?
7. Your Dough Passes More Than One Test
There isn’t one single sign that tells you exactly when sourdough is done proofing.
Instead, look for several signs happening together:
The dough has risen, bubbles are visible, the surface looks puffy, and the dough has a gentle jiggle.
These clues are much more reliable than simply setting a timer.
What Does Overproofed Sourdough Look Like?
Overproofed sourdough often becomes very loose, sticky, and difficult to shape. It may spread quickly when removed from its container and have trouble holding tension during shaping.
If your dough repeatedly turns out this way, try shortening your proofing time on your next loaf.
On the other hand, dense dough that hasn’t risen much and springs back immediately when poked probably needs more time.
Related Post: Simple Sourdough Bread Recipe
Learn to Understand the Dough
Sourdough recipes often give proofing times as a helpful starting point, but your dough ultimately determines when fermentation is finished.
Temperature, starter strength, hydration, and your kitchen environment can all change how quickly sourdough proofs.
The more bread you bake, the easier these signs become to recognize. Look for rise, bubbles, puffiness, jiggle, and an airy texture, and you’ll become much more confident knowing when your sourdough is ready to move on to the next step. I hope this helped you understand how to know if your sourdough is done proofing!